How to Login
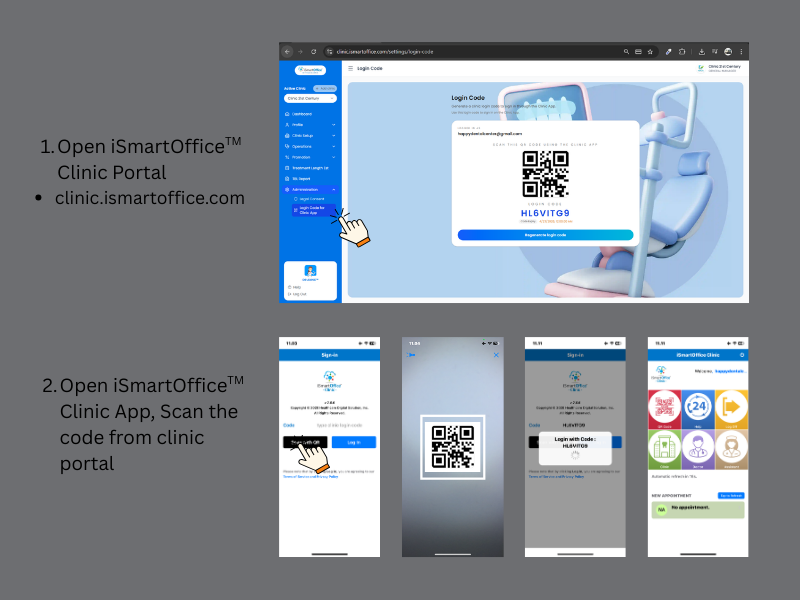
To log in to the iSmartOffice™ Clinic App, clinic staff must obtain a secure login code from the iSmartOffice™ web portal. This method is designed to ensure both security and ease of access for authorized users.
Step-by-Step Instructions
- Access the Web Portal
Open a web browser and go to:
https://clinic.ismartoffice.com - Navigate to the Login Code Page
After logging in to the web portal, go to:
Administration → Login Code for Clinic App - Choose a Login Method
On the Login Code for Clinic App page, you will see two options:- Scan QR Code
Use the Clinic App to scan the displayed QR code. This will automatically log you in without manual input. - Manual Code Entry
Alternatively, you can manually enter the login code shown on the page into the Clinic App.
- Scan QR Code
- Access the Clinic App
Once the QR code is scanned or the login code is entered correctly, the Clinic App will log in automatically.
This login method ensures that only authorized clinic staff can access the Clinic App, while also keeping the login process quick and convenient—no usernames or passwords are required on the app itself.
Managing New Patient Appointments
When a patient creates a new appointment, it will appear automatically in the system shortly after submission.
Reviewing a New Appointment
- Open the Appointment List
Newly created patient appointments will be displayed by default. - Accept or Reject the Appointment
Select the appointment to review the details.
You may then choose to:- Accept the appointment, or
- Reject the appointment.
Viewing Doctor Schedule Applicants
By default, the system displays patient appointments.
If you would like to view doctor schedule applicants, tap the magenta box labeled “Doctor” to switch the view.
Confirming Patient Visits & Validating QR Codes
The QR scanning feature is used to confirm patient visits and validate Best Deal coupons.
Confirming a Patient Visit
- Ensure the Appointment is Accepted
The clinic must first accept the patient’s appointment request. - Ask the Patient to Show Their QR Code
When the patient arrives at the clinic, ask them to open the iSmartOffice™ Patient App and display their QR code. - Scan the QR Code
Scan the QR code to confirm the patient’s visit in the system.
Once scanned, the appointment will be marked as confirmed. - Complete the Appointment
After the treatment has been completed, the clinic can update the appointment status to Completed.
Validating a Best Deal Coupon
If the patient has purchased a Best Deal Coupon, you can also scan the coupon’s QR code to validate it.
This ensures the coupon is properly recorded and redeemed in the system.